Battery switch on travel trailer function is crucial for managing your RV’s power. Understanding how to use your battery switch correctly is key to preventing dead batteries and electrical issues. This guide breaks down everything you need to know, from the different types of switches to troubleshooting common problems and essential safety practices. We’ll cover connecting and disconnecting batteries, maintaining your system, and even delve into the different types of batteries used in travel trailers and how they impact your setup.
We’ll explore the various types of battery switches available – single, dual, and those with a “both” position – and explain their wiring configurations. We’ll also cover the importance of safety precautions when working with batteries, including the use of proper eye protection and ventilation. This will ensure you can confidently maintain your travel trailer’s electrical system.
Understanding Battery Switch Functionality in Travel Trailers
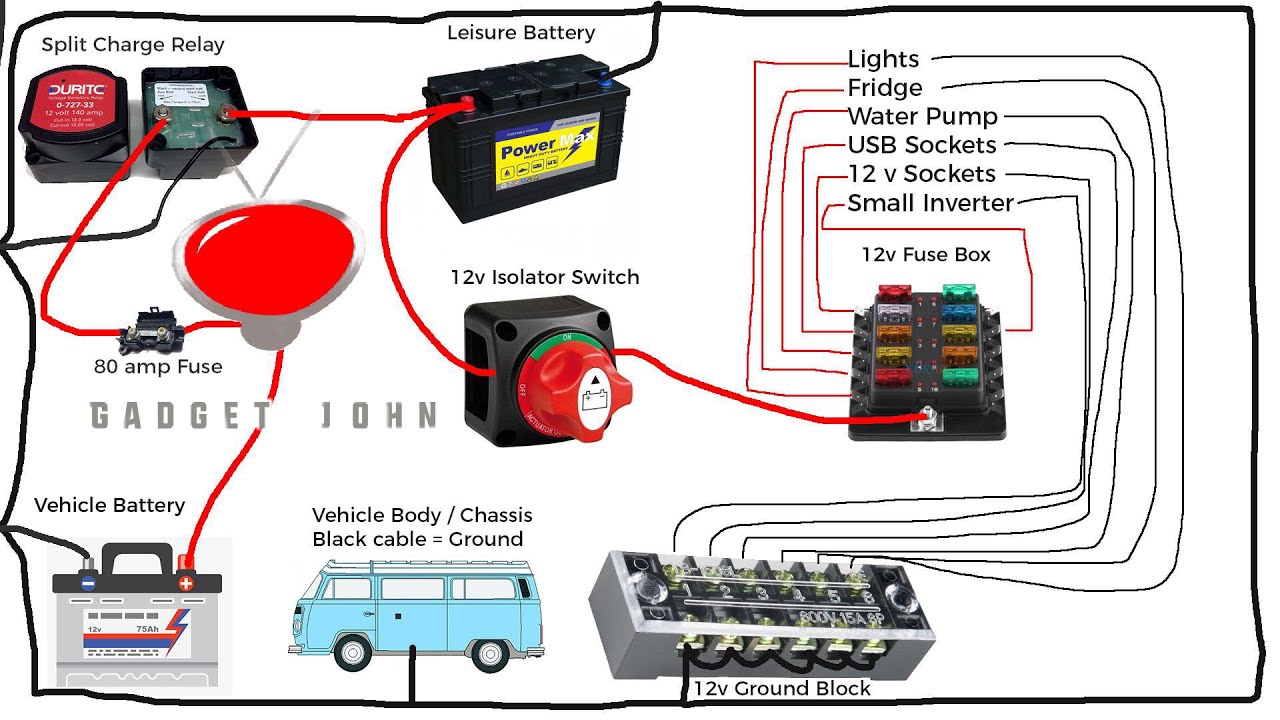
A battery switch is a crucial component in a travel trailer’s electrical system, allowing you to manage the power flow from your house batteries and potentially a second battery, such as a starting battery for your tow vehicle. It provides control and protection, preventing accidental drain and enabling you to choose which battery or combination of batteries supplies power to your trailer’s appliances and systems.
Understanding how it works is key to maintaining your trailer’s electrical health.
Battery Switch Types
Travel trailers typically utilize different types of battery switches to manage their power sources. The most common are the 1-2-Both-Off switches and dual battery switches. A 1-2-Both-Off switch allows you to select power from either battery 1, battery 2, both batteries simultaneously, or to completely disconnect both batteries from the trailer’s electrical system. This provides a simple way to isolate batteries for maintenance or storage.
Dual battery switches often incorporate additional features like an automatic charging system that manages the charging of both batteries. They can also be more sophisticated and offer better protection from overcharging or discharging.
Typical Wiring Configuration
The wiring configuration for a battery switch system is generally straightforward. The positive (+) cables from each battery connect to the input terminals of the battery switch. From the switch’s output terminal, a single positive cable then runs to the positive bus bar or distribution point of the trailer’s 12V system. The negative (-) cables from each battery are typically connected directly to the trailer’s chassis, creating a ground path.
This setup allows the switch to control the flow of positive current to the trailer’s electrical system, while the negative current flows through the ground path. It’s important to ensure all connections are secure and properly insulated to prevent shorts and electrical issues. Incorrect wiring can lead to damage to your batteries or electrical components.
Operating a Battery Switch
Operating a battery switch is generally simple but requires understanding its positions. Before operating the switch, always ensure the power to the trailer is off.
- Identify the switch positions: Familiarize yourself with the switch’s markings, typically indicating “1,” “2,” “Both,” and “Off.”
- Select the desired power source: Position the switch to “1” to use battery 1, “2” to use battery 2, or “Both” to use both batteries simultaneously.
- Turn off the power: To completely disconnect the batteries from the trailer’s system, switch to the “Off” position. This is crucial for preventing battery drain during storage or when performing maintenance.
- Check for proper operation: After changing the switch position, verify that the desired power source is active by checking the functionality of your trailer’s appliances and systems.
Remember to consult your trailer’s owner’s manual for specific instructions and diagrams related to your battery switch and electrical system. Improper operation can lead to damage or injury.
Connecting and Disconnecting Batteries
Properly connecting and disconnecting your travel trailer’s house battery is crucial for safe and reliable operation. This process involves managing the connection between your trailer’s battery bank and your tow vehicle’s charging system, ensuring power for your appliances and preventing damage to your electrical system. Remember, always prioritize safety when working with batteries.Connecting and disconnecting your house battery involves using a battery switch, typically located near your battery bank.
This switch allows you to isolate the house battery from the charging system, preventing parasitic drain when the trailer is not connected to your tow vehicle. This section details the process and important safety considerations.
Battery Connection and Disconnection Procedure
Before starting any work, always locate and understand your specific trailer’s battery switch configuration. This might involve a simple on/off switch or a more complex system with multiple positions. Consult your owner’s manual for detailed instructions specific to your model. Generally, the process involves turning the switch to the “off” position to disconnect the house battery from the charging system, and to the “on” position to connect it.
Never force a switch; if it’s difficult to move, investigate the cause before proceeding. Always visually inspect the connections for corrosion or looseness before turning the switch on or off.
Safety Precautions When Working with Batteries, Battery switch on travel trailer function
Working with batteries requires careful attention to safety. Always wear appropriate safety glasses or eye protection to shield your eyes from potential splashes of battery acid. Ensure adequate ventilation to prevent the buildup of potentially explosive hydrogen gas. Batteries produce hydrogen gas during charging and discharging, which is highly flammable. Never work near open flames or sparks.
Wear gloves to protect your hands from acid and potential corrosion. If you spill battery acid on your skin or clothing, immediately flush the affected area with plenty of water and seek medical attention if necessary.
Maintaining Battery Terminals and Connections
Regular maintenance of your battery terminals and connections is essential for optimal performance and longevity. Clean the terminals periodically with a wire brush or terminal cleaner to remove corrosion. Apply a battery terminal protector to prevent future corrosion. Tighten all connections to ensure a secure electrical contact. Loose connections can lead to voltage drops and reduced charging efficiency.
So, you’re an audiophile who travels? Awesome! Check out this guide on audiophile travel setups for tips on packing your gear without sacrificing sound quality. It’s all about smart choices and lightweight equipment. Then, once you’ve got your portable setup dialed in, consider exploring more advanced options by looking at this other resource on audiophile travel setups for some seriously high-end portable solutions.
Remember, good sound doesn’t have to stay at home!
Visually inspect the battery cables for any signs of damage or wear and replace them if necessary. A regular cleaning and inspection schedule, perhaps every six months, will significantly extend battery life and system reliability.
Common Battery Connection Problems and Solutions
| Problem | Cause | Solution | Prevention |
|---|---|---|---|
| Battery not charging | Loose or corroded connections | Clean and tighten connections; replace corroded cables | Regularly clean and inspect terminals; apply terminal protector |
| Low voltage | Faulty battery switch | Inspect and repair or replace the switch | Regularly check switch functionality |
| Intermittent power | Loose cable connections | Tighten all cable connections | Regularly check and tighten connections |
| Complete power failure | Dead battery | Charge or replace the battery | Regular battery maintenance and testing |
Troubleshooting Common Battery Switch Issues
Dealing with a faulty battery switch in your travel trailer can be frustrating, but understanding the common problems and how to diagnose them can save you time and money. This section will guide you through identifying issues, testing your switch, and, if necessary, replacing it.
Common Battery Switch Problems
Several issues can arise with your travel trailer’s battery switch. These range from simple problems like blown fuses to more complex issues involving the switch itself or corroded connections. Identifying the specific problem is the first step towards a quick fix. Common problems include no power to the trailer, blown fuses in the battery switch or related circuits, and corrosion on the switch terminals or battery posts.
So, you’re an audiophile who travels? Awesome! Check out this guide on creating the perfect audiophile travel setup for amazing sound on the go. It covers everything from portable DACs to noise-cancelling headphones. But if you need more in-depth info on specific gear, another great resource is this comprehensive article on audiophile travel setups , which dives deep into component choices and packing strategies.
Get ready to enjoy your music, wherever your adventures take you!
Sometimes, the problem isn’t the switch at all, but rather a loose connection or a faulty component elsewhere in the electrical system.
Diagnosing a Faulty Battery Switch
Before you start replacing parts, it’s crucial to properly diagnose the problem. A systematic approach is key. First, check your fuses. A blown fuse is a common culprit, and replacing it is often a simple solution. If the fuse is intact, visually inspect the battery switch itself for any signs of damage, loose wiring, or corrosion.
Use a multimeter to test the voltage at various points in the circuit, comparing readings to expected values. If the switch is the likely culprit, further testing with a multimeter may be needed to verify its internal functionality, comparing voltage across the switch’s terminals in different positions.
Replacing a Battery Switch
Replacing a battery switch usually involves disconnecting the battery, removing the old switch, and installing the new one. Before beginning, always disconnect the negative battery terminal first to prevent accidental shorts. Then, carefully remove any wires connected to the old switch, noting their positions. Use a suitable screwdriver to remove the old switch from its mounting location. Mount the new switch securely in the same location.
Connect the wires to the new switch, ensuring they are correctly placed. Reconnect the battery and test the system to ensure it’s working correctly. Remember to always consult your trailer’s wiring diagram to confirm the correct wiring configuration.
Troubleshooting Flowchart
The following flowchart Artikels the steps to troubleshoot a faulty battery switch:
| Step | Action | Result |
|---|---|---|
| 1 | Check all fuses related to the battery system. | If blown, replace fuse and retest. If problem persists, go to step 2. If fuses are intact, go to step 3. |
| 2 | Inspect fuse holder for signs of damage or overheating. | If damaged, replace fuse holder. If problem persists, go to step 3. |
| 3 | Visually inspect battery switch for corrosion or damage. | If corrosion is present, clean terminals. If damage is visible, go to step 4. If no issues are found, check battery connections and wiring elsewhere in the system. |
| 4 | Test voltage at switch terminals with a multimeter. | If no voltage is present, check wiring. If voltage is present but the switch doesn’t function correctly, replace the battery switch. |
Battery Management and Maintenance: Battery Switch On Travel Trailer Function
Keeping your travel trailer batteries in top shape is crucial for reliable power on the road. Neglecting maintenance can lead to premature failure, leaving you stranded without lights, refrigeration, or other essential systems. Regular checks and proactive care will significantly extend the lifespan of your batteries and ensure a smooth camping experience.
Battery Voltage and State of Charge Testing
Knowing the voltage and state of charge (SOC) of your batteries is fundamental to effective battery management. A simple voltage test provides a quick assessment of your battery’s health. Using a multimeter, measure the voltage across the battery terminals. A fully charged 12-volt battery should read around 12.6 to 13.2 volts. Readings below 12.2 volts indicate a low state of charge, requiring immediate attention.
More sophisticated battery testers can provide a more precise SOC measurement, factoring in factors like battery age and temperature. These testers often provide a percentage indicating how much charge remains.
Charging Travel Trailer Batteries
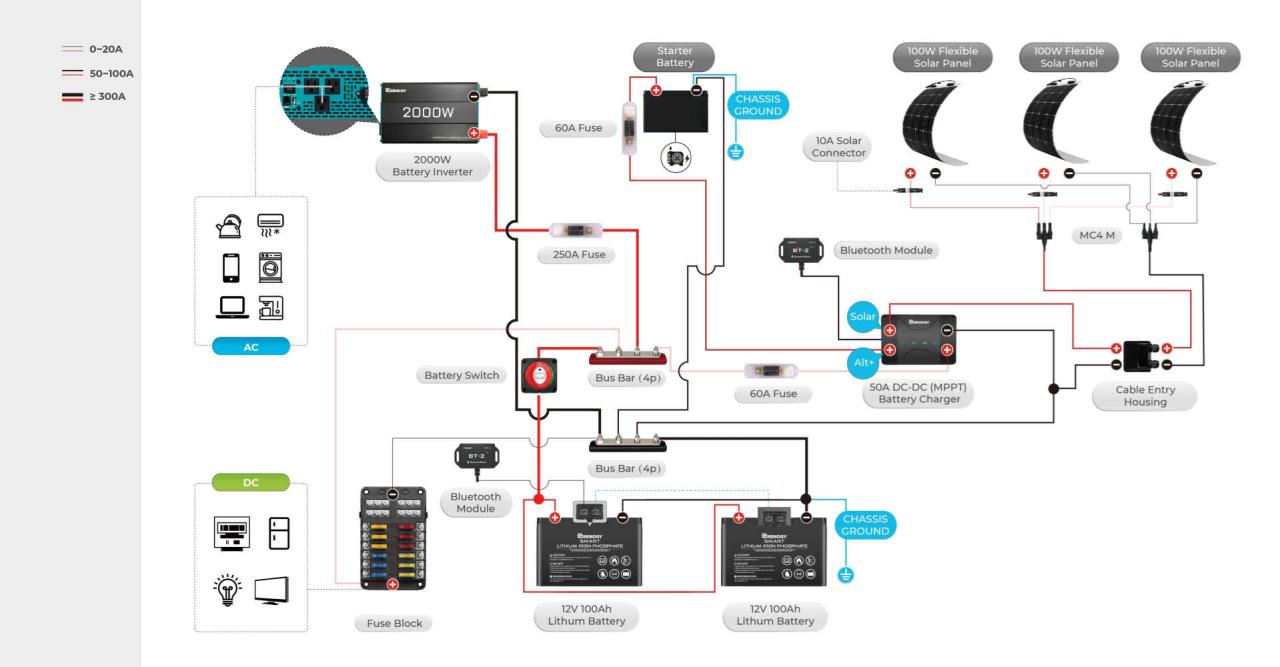
There are several ways to charge your travel trailer batteries. Shore power, using a 30- or 50-amp hookup at a campground, is the most common and convenient method. This usually involves connecting a charger to the battery via a dedicated hookup inside your trailer. Solar panels offer a sustainable alternative, converting sunlight into electricity to charge your batteries.
The charging rate depends on the size of the panel and sunlight conditions. Finally, you can charge your batteries using your vehicle’s alternator. This requires a suitable charging system, often involving a dedicated wiring setup, and is typically used for maintaining a charge while traveling. It’s crucial to ensure the charging system is properly sized and regulated to prevent overcharging.
Preventative Battery Maintenance Schedule
A regular maintenance schedule will ensure your batteries perform optimally.
- Monthly Inspection: Visually inspect the batteries for corrosion, loose connections, or any physical damage. Clean terminals with a wire brush and baking soda solution if necessary.
- Quarterly Testing: Test battery voltage and state of charge using a multimeter. Check for any signs of sulfation (white, powdery deposits on the terminals) which indicates a need for desulfation or battery replacement.
- Annual Deep Cycle Charge: Perform a deep cycle charge to ensure the batteries are fully charged and any sulfation is minimized. This is usually done with a battery charger on shore power.
- Every Two Years (or as needed): Consider having your batteries professionally tested to assess their overall health and capacity. Battery life can vary depending on usage and environmental conditions, with an average lifespan ranging from 3 to 5 years.
Mastering your travel trailer’s battery switch is about more than just turning power on and off; it’s about understanding your RV’s electrical system and ensuring its longevity. By following the safety guidelines, performing regular maintenance, and troubleshooting effectively, you can extend the life of your batteries and avoid costly repairs. Remember, proper battery management is crucial for enjoying worry-free adventures on the road.
So, get out there and explore with confidence!
Quick FAQs
What happens if I leave my battery switch on “both” all the time?
Leaving the switch on “both” constantly can drain your batteries faster, especially if you’re not plugged into shore power. It’s best to switch to “off” when not using the trailer to conserve battery life.
How often should I check my battery terminals?
Inspect your battery terminals at least every three months, or more frequently if you’re in a humid or salty environment. Look for corrosion and clean as needed.
Can I use a different type of battery than what came with my travel trailer?
You might be able to, but it’s best to consult your trailer’s manual or a qualified RV technician. Using the wrong type of battery could damage your electrical system or void your warranty.
My battery switch is completely unresponsive. What should I do?
Check your fuses first! If the fuses are blown, replace them with the correct amperage. If the problem persists, the switch itself might be faulty and needs replacing.
